NetBeans Google Toolbar Module Tutorial (Part 2)Ming Xu, Ezhilan Narasimhan
Building on top of the concepts and principles learned in the NetBeans Google Toolbar Module Tutorial, this tutorial shows you how to develop a more advanced Google search plugin that will display its results inside applications built on top of the NetBeans Platform, such as NetBeans IDE. In this tutorial, you create a more advanced version of the plugin in part 1, by recreating it and then adding support from the JDIC native browser, which is part the JDesktop Integration Components (JDIC) project, to it. Note: You can download the full source code for this plugin. This tutorial will cover the following topics:
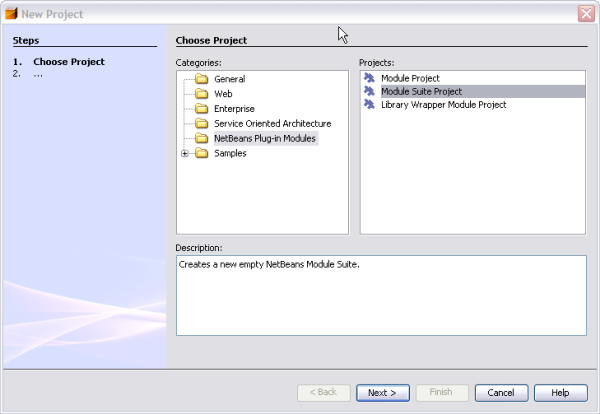
Creating a Module SuitePlug-ins for the NetBeans platform are based on modules. Our project will consist of a few modules that will work together to provide this functionality. First, we need a module suite Project to group modules. In our case, the module suite will group a plug-in module and a library wrapper module. A library wrapper module enables us to call the API of an external library. To create a Module Suite Project, select the New Project from the File menu. In the New Project Wizard, go to the NetBeans Plug-in modules category, and select Module Suite Project as shown below.
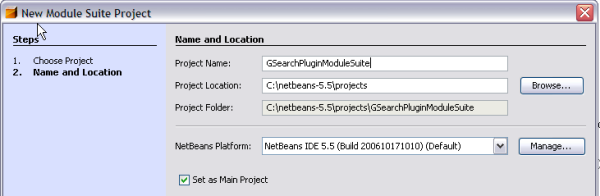
Click the Next button. Type in GSearchPluginModuleSuite as the project name, then click the Finish button.
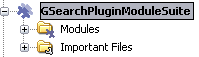
The GSearchPluginModuleSuite project will appear in the Project window on the left side of NetBeans IDE.
Creating and Adding the Plug-in module and the Library Wrapper ModuleIt is time to create our plug-in module. Click the File menu, and select New Project. Under the NetBeans Plug-in modules, select Module Project.
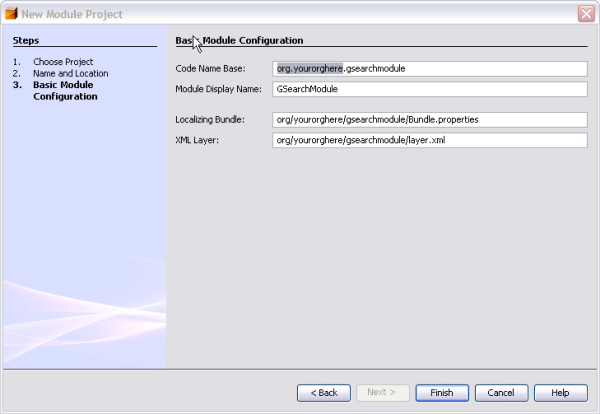
Click the Next button. Enter GSearchModule in the Project Name field. Click the Add to Module Suite radio button to add this module to the GSearchPluginModuleSuite module suite that we created in step 1 above.
Click Next to show the module configuration page. Enter NetBeans.plugins.gsearchmodule in the Code Name Base field.
Click the Finish button. The module project will show in the Project window.
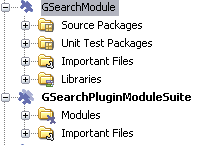
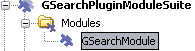
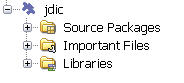
In the Projects window, double-click the GSearchPluginModuleSuite node to open it. Then double-click the the Modules node to open it. You will find that the GSearchModule has been added into the GSearchPluginModuleSuite.
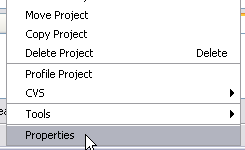
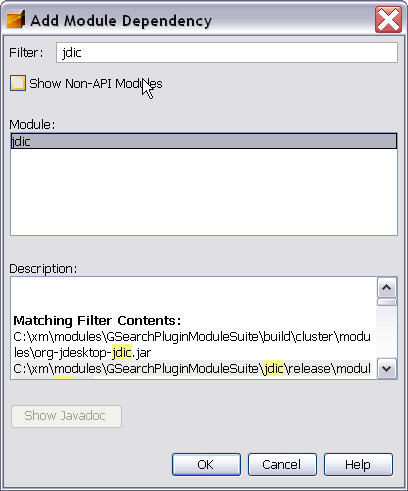
Now we will add the necessary libraries that will be called upon to implement the search plugin. In the Projects Window, right-click the GSearchModule node and click Properties from the popup-menu.
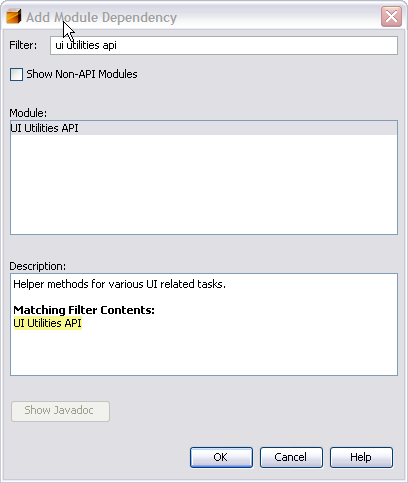
Click Add Dependency.
Type
Click the OK button. Repeat these steps to similiarly add these additional modules
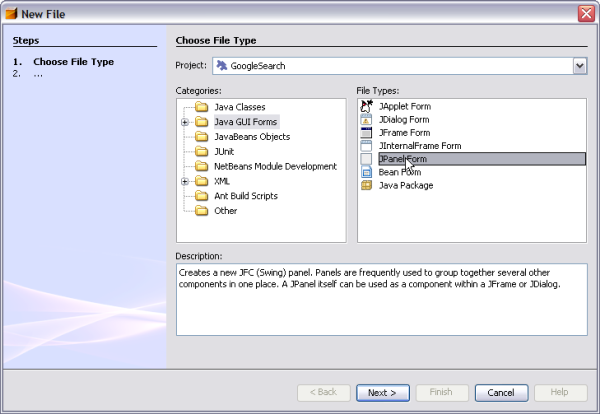
Creating a JPanel FormWe will create a JPanel to hold the controls of the google search toolbar. Go to the File menu and select New File. Select the Java GUI Forms category and select JPanelForm.
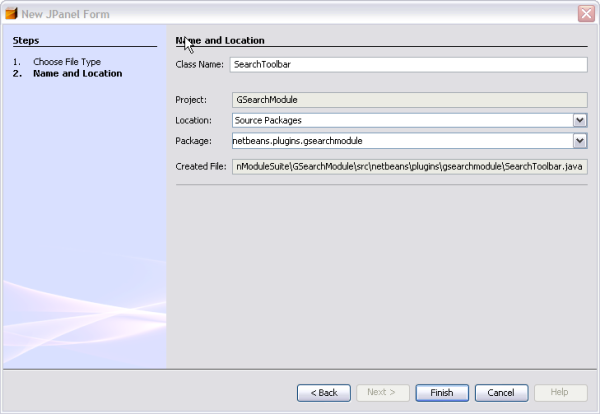
Click Next to go to the Edit window; type in the name and select the correct package as shown below.
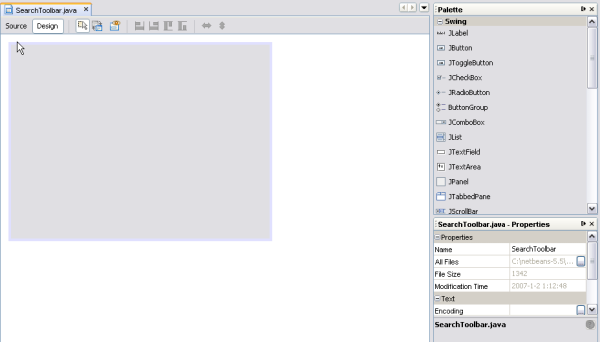
Click Finish. The IDE will open up the Panel editor. Adding the Visual Elements to the JPanelForm
From the GUI component palette, drag and drop a JTextFiled control and a JButton control into the SearchToolbar panel. Set the path to the google icon in the JButton's Property. Resize the SearchToolbar panel to the size of a toolbar item. Your panel should now look like this:
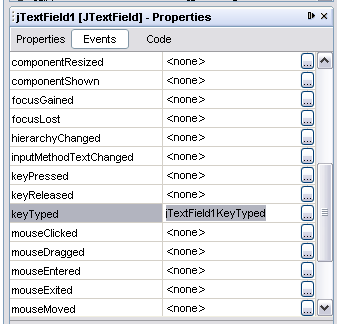
Retrieving Query Text With an Event HandlerThe text typed into this text field by the user will need to be retrieved to perform the search query. To retrieve the text inside JTextFiled control, we need to handle keyTyped events which can be found in Events tab of the properties panel shown below.
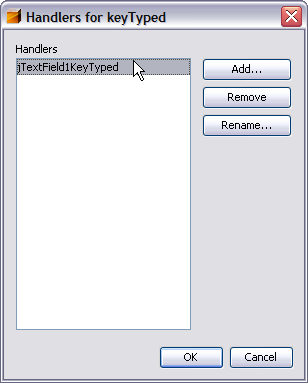
In the jTextField1's Properties window, click the "..." button on the right side of keyTyped to add the handlers.
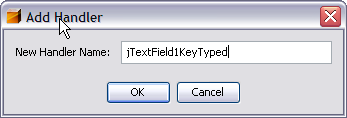
Click the add button to add an event handler.
Type in Implementing the KeyTyped Event HandlerWe now need to implement the event handler to handle key typed events. We would like to retrieve the text typed and perform a google search operation against that text. We open a browser window embedded within the output window, and supply it the text typed. The code is shown below: Copy the following code inside JTextFieldKeyTyped method.
int i = evt.getKeyChar();
if (i==10){//The ENTER KEY
// we display the google url.
    try{
        Component[] comps = GSearchResultTopComponent.getDefault().getComponents();
        GSearchResultTopComponent.getDefault().open();
        WebBrowser browser1 = null;
        if (comps.length == 0){
            browser1 = new WebBrowser(new URL("https://www.google.com"));
            GSearchResultTopComponent.getDefault().add(browser1);
            GSearchResultTopComponent.getDefault().getParent().addComponentListener(
            new ComponentAdapter() {
                public void componentResized(ComponentEvent e){
                    int a = 1;
                    Component[] comps = GSearchResultTopComponent.getDefault().getComponents();
                    if ((comps!= null) && (comps.length > 0)){
                        ((WebBrowser)comps[0]).setSize(GSearchResultTopComponent.getDefault().getSize());
                        ((WebBrowser)comps[0]).setVisible(true);
                    }
                }
            });
            browser1.addMouseListener( new MouseAdapter() {
                public void mouseEntered(MouseEvent e) {
                    Component[] comps = GSearchResultTopComponent.getDefault().getComponents();
                    if (comps.length > 0){
                        ((WebBrowser)comps[0]).setSize(GSearchResultTopComponent.getDefault().getSize());
                        ((WebBrowser)comps[0]).setVisible(true);
                    }
                }
            });
        }
        else browser1 = ((WebBrowser)comps[0]);
        browser1.setURL(new URL("https://www.google.com/search?hl=en&q;="+jTextField1.getText()+"&btnG;=Google+Search"));
        browser1.setVisible(true);
    } catch (Exception eee){
        return; //nothing much to do
    }
}
At this time, you may see many import errors, some of which can fixed by pressing the Alt-Shift-F key, which adds the package needed in the beginning of the source code. However, we still have some unresolved errors. These errors show that
the IDE can not find the class Adding the JDIC Library Wrapper for the BrowserThe JDIC library is a Java library to embed external process(es) into the Java environment. Download the file and unzip it
into a new directory. Copy the jdic folder into the Special note for Solaris 10 users:
Assuming you want
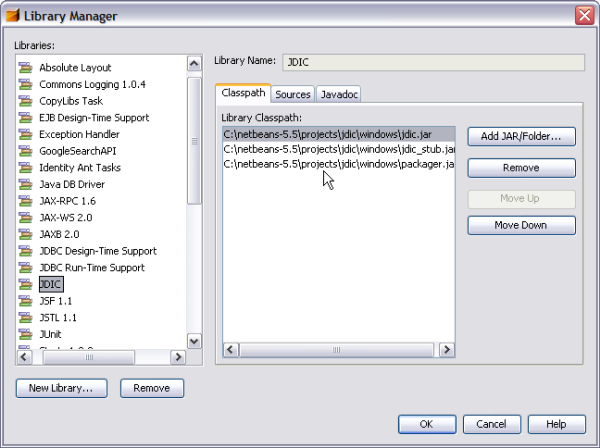
to unzip the JDIC library into this path Click Tool menu, in the dropdown items, click Library Manager menu, and import the jar files into NetBeans as shown below.
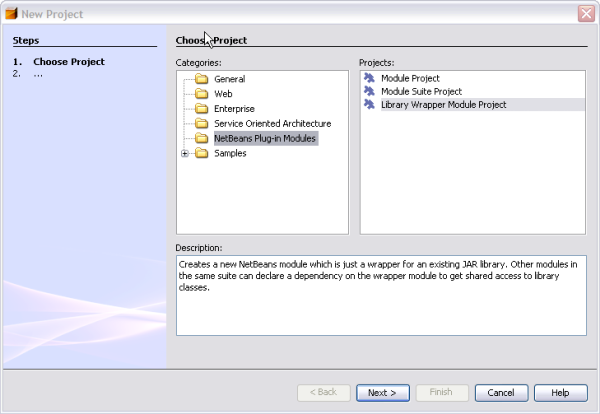
Create a wrapper module for the JDIC library from Library manager. We will start from New Project, then choose Library Wrapper Module Project.
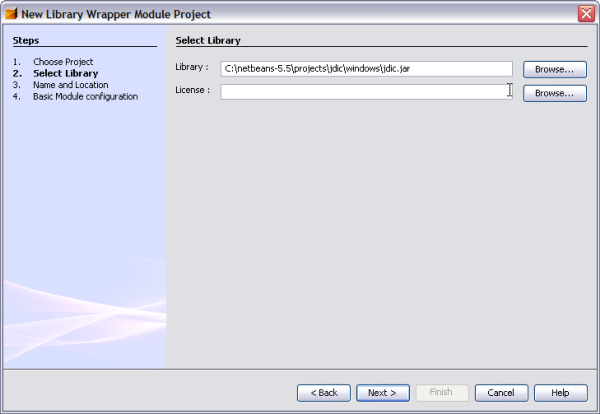
Click Next, and select the jdic.jar library file from your file system.
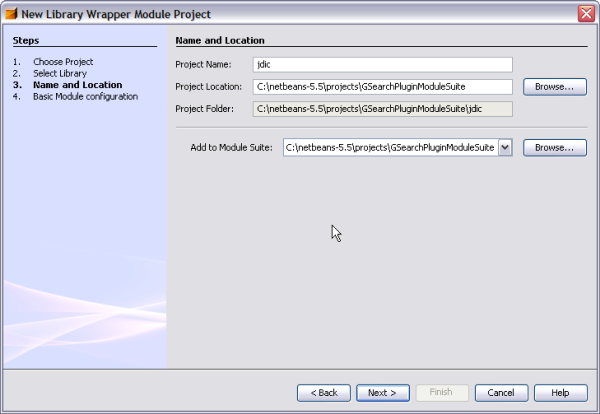
Click Next. Enter the Project Name and select the GSearchPluginModuleSuite.
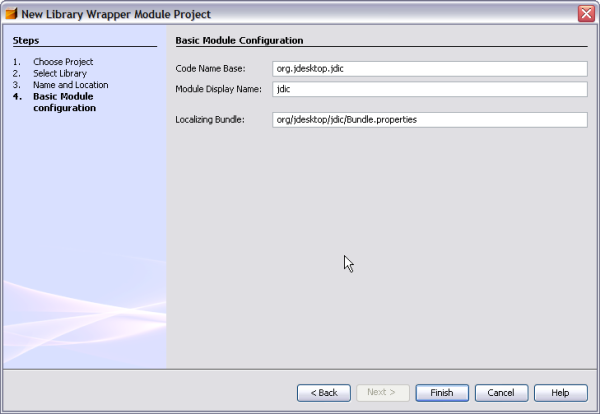
Click Next and accept default configuration values.
Click Finish. The project appears in the Projects window.
Creating Module Dependencies Between JDIC and GSearchModuleBefore we can use the JDIC library wrapper, we need to add a module dependency between the JDIC module and GSearchModule.
Press Alt-Shift-F to resolve import errors concerning to the WebBrowser class. The directory
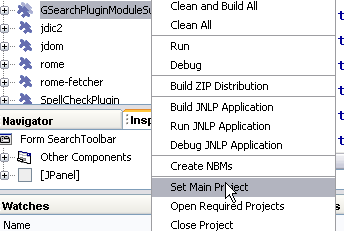
If you see an error message about Set the Module as Main Project
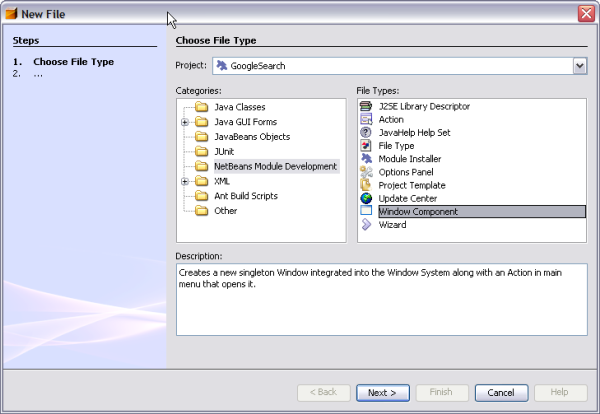
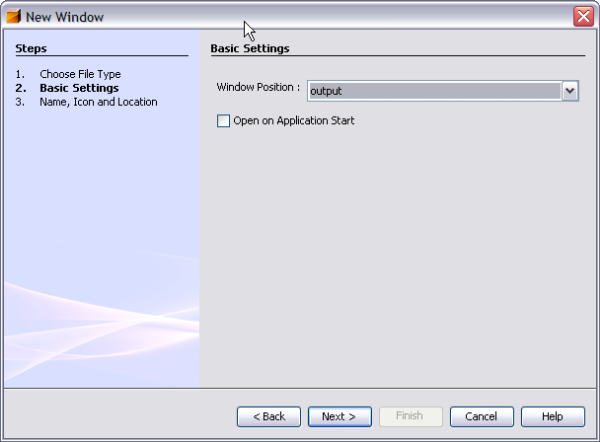
Docking the Embedded Browser Into the Output Area.To dock the embedded browser as a tab into output area, we need to use the Window Component template.
In the next window,
select
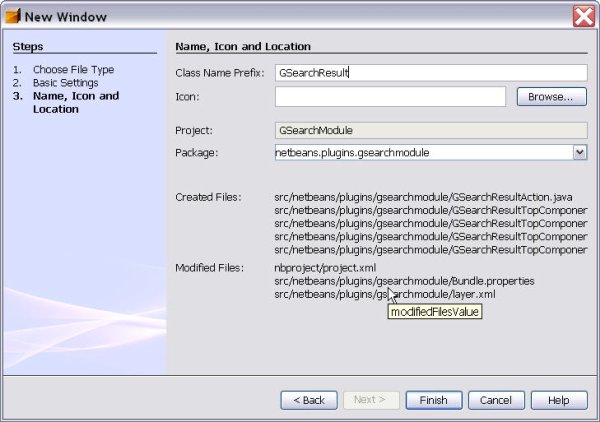
Click Next. Enter the name for the component in the next window.
Now, you can use this window component to hold the embedded browser. Setting the Browser Window SizeReturn to SearchToolbar.java, you will find all compiling errors have gone. Copy the following code into the constructor of SearchToolBar.java. This will initialize the size of the browser window to the same size as the window component. public SearchToolbar() {
initComponents();
GSearchResultTopComponent.getDefault().addPropertyChangeListener(
new PropertyChangeListener() {
public void propertyChange(PropertyChangeEvent evt) {
Component[] comps = GSearchResultTopComponent.getDefault().getComponents();
if (comps.length > 0){
((WebBrowser)comps[0]).setSize(GSearchResultTopComponent.getDefault().getSize());
((WebBrowser)comps[0]).setVisible(true);
}
}
}
);
}
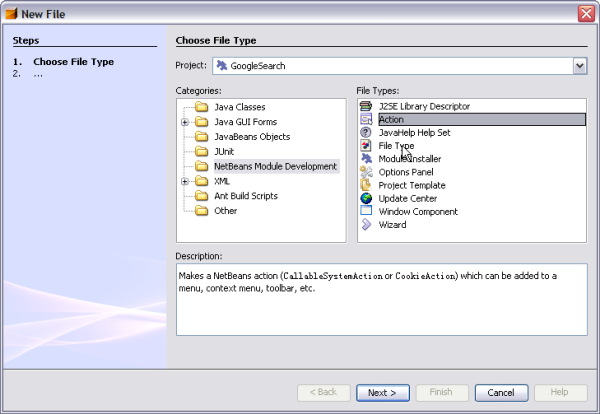
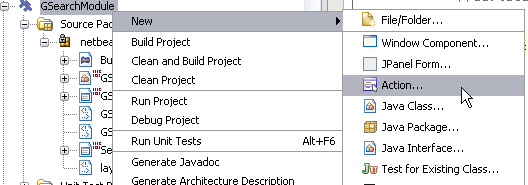
Press Alt-Shift-F to automatically add missing imports. Adding the Search Panel to the NetBeans IDE ToolbarTo install the SearchToolbar panel into the IDE's toolbar, we create an Action class. Right-click the project node, and select New File from the context-menu. In the New File wizard, select the NetBeans Module Development category, and select the Action file type.
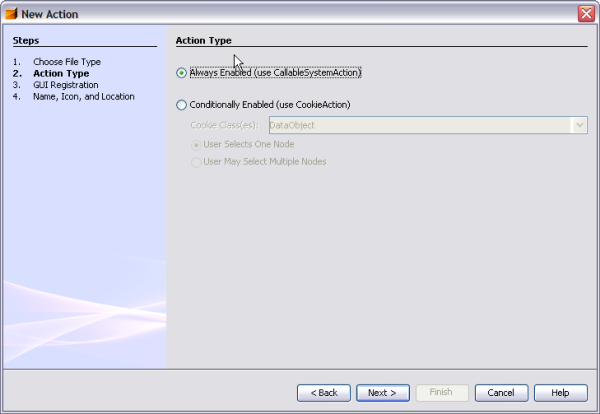
Select the Always Enabled Action type.
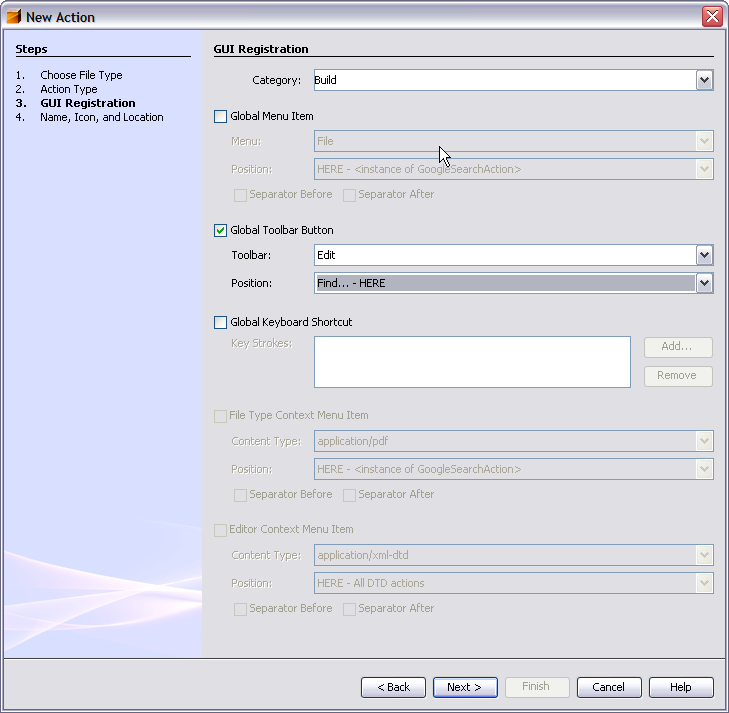
On the next page, check Global Toolbar Button, and set the locations of the toolbar item.
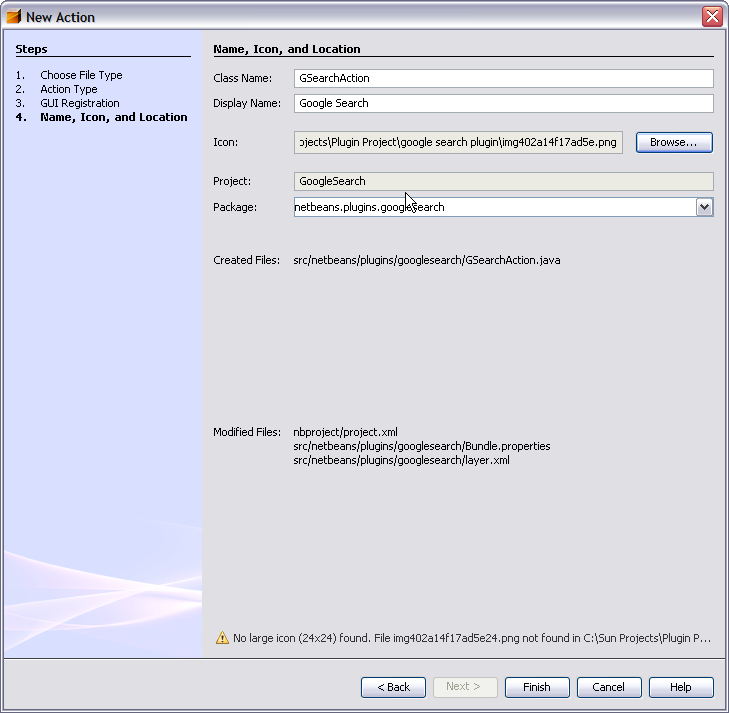
On next page, set the Name, Display Name and Icon for the toolbar item.
Type the following piece of code into the generated Java file.
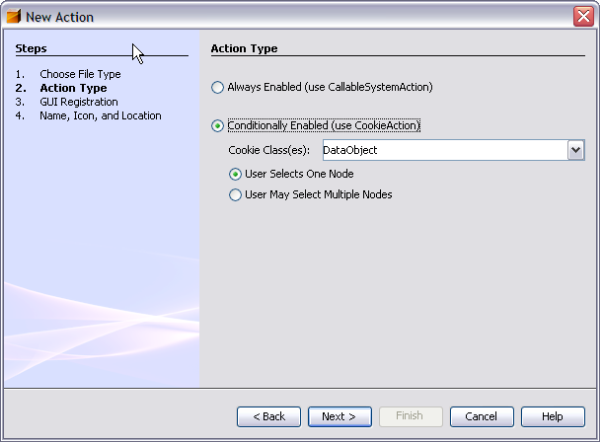
Finally, we add a handler to process the selected text in the editor window. Right-click the project node, and select New > Action from the context-menu to open the Action wizard.
Select the Conditionally Enabled check box.
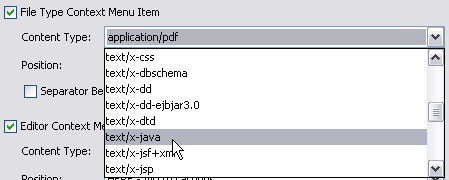
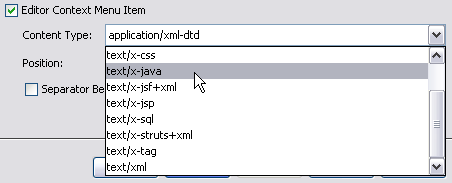
Check the File Type Context Menu Item and select text/x-java from list. Also Check the Editor Context Menu Item and select text/x-java from list. Set the position where the action will appear.
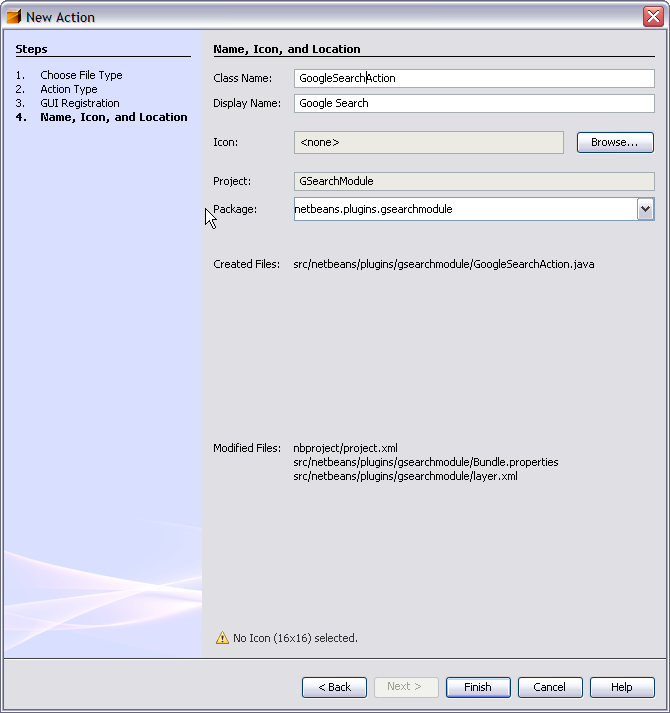
In the next window, type in Class Name and Display Name
Click Finish. Overwrite the performAction method, and put the following code inside.
EditorCookie cookie = (EditorCookie) activatedNodes[0].getCookie(EditorCookie.class);
try {
if (cookie != null) {
JEditorPane[] panes = cookie.getOpenedPanes();
if (panes.length > 0) {
String selection = panes[0].getSelectedText();
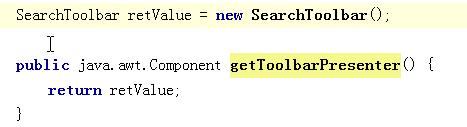
CallableSystemAction toolbar = ((CallableSystemAction)CallableSystemAction.get(GSearchAction.class));
SearchToolbar sToolBar = (SearchToolbar)toolbar.getToolbarPresenter();
sToolBar.search(selection);
}
}
} catch (Exception ex) {
}
Add a Search method in SearchToolbar.java
public void search(String keywd)
{
    jTextField1.setText(keywd);
    try{
        Component[] comps = GSearchResultTopComponent.getDefault().getComponents();
        GSearchResultTopComponent.getDefault().open();
        WebBrowser browser1 = null;
        if (comps.length == 0)
        {
            browser1 = new WebBrowser(new URL("https://www.google.com"));
            GSearchResultTopComponent.getDefault().add(browser1);
            GSearchResultTopComponent.getDefault().getParent().addComponentListener(new ComponentAdapter()
            {
                public void componentResized(ComponentEvent e)
                {
                    int a = 1;
                    Component[] comps = GSearchResultTopComponent.getDefault().getComponents();
                    if ((comps!= null) && (comps.length > 0))
                    {
                        ((WebBrowser)comps[0]).setSize(GSearchResultTopComponent.getDefault().getSize());
                        ((WebBrowser)comps[0]).setVisible(true);
                    }
                }
            });
            browser1.addMouseListener( new MouseAdapter() {
                public void mouseEntered(MouseEvent e) {
                    Component[] comps = GSearchResultTopComponent.getDefault().getComponents();
                    if (comps.length > 0)
                    {
                        ((WebBrowser)comps[0]).setSize(GSearchResultTopComponent.getDefault().getSize());
                        ((WebBrowser)comps[0]).setVisible(true);
                    }
                }
            });
        }
        else browser1 = ((WebBrowser)comps[0]);
        browser1.setURL(new URL("https://www.google.com/search?hl=en&q;="+jTextField1.getText()+"&btnG;=Google+Search"));
        browser1.setVisible(true);
    } catch (Exception eee){
        return; //nothing much to do
    }
}
Here we use EditorCookie to get the selected text. EditorCookie defines standard operations with a text document and an editor displaying it. We obtain the opened pane (the most selected component) on the EditorCookie object of the activated node, and retrieve the selected text using the pane's getOpenedPanes method. GSearch's getToolbarPresenter method return the instance of SearchToolbar panel, whose search method take the selected text and perform the actual search. Running the ProjectClick the
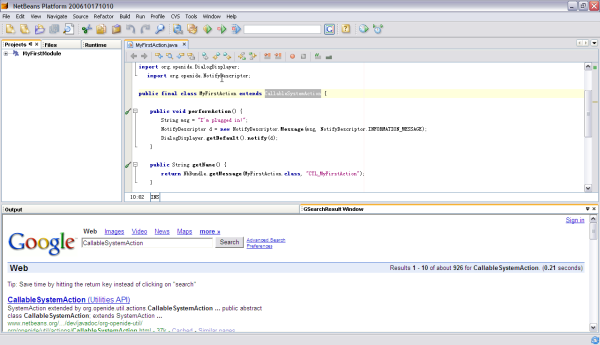
Open any Java source file, and select the keyword to search. Right-click to show the pop-up window and then click Google Search.
Or, you can modify the search keyword by entering the keyword in the toolbar text box; press the enter key to show the search results.
The search results will show in an embedded browser in the output area in your IDE.
This plug-in has been tested on Windows XP and Solaris 10 x86. SummaryIn this article, we showed you how to create a Google search plugin for NetBeans IDE, which involves creating three kinds of module projects: Creating a toolbar for the IDE, wrapping external libraries, and enhancing the Java editor. In this tutorial, the search results are shown in an embedded browser inside NetBeans IDE. One could also use the Google Web APIs to search, fetch the results and display in any visible component. Another possible improvement, for example, would be capturing and searching for compiler errors from the output window. We appreciate the help from Tim Boudreau. Tim is very knowledgeable in NetBeans and helped a lot with plugins development questions. In addition we like to acknowledge the review help and suggestions from Ashwin Rao and his team. Thanks to the Telco team of ISV engineering for piloting our demos and providing useful suggestions. The full source code for this article may be downloaded as GSearchPluginModuleSuite.zip Author Bio:Ming Xu is a student intern at Sun Microsystems Inc. He is a graduate student at San Jose State Univ. He majored in software engineering and his main interest is in enterprise software development in Java and C/C++. Ezhilan Narasimhan works for the ISV engineering team at Sun Microsystems Inc. He works on architecture, performance and other engineering tasks within the Telco industry. |


 button to run the project.